
Standalone Button
Welcome to this free course for learning how to create an enteprise Angular project from scratch by using only Standalone Components.
A custom Button
We’re going to create all UI related components and directives inside the
src/app/ui folder.
pnpm exec ng generate d ui/buttonAvoid using the global ng
pnpm exec ng, is the equilvalent of ./node_modules/.bin/ng.
We don’t need to use the --standalone option since we created the project
with the --standalone flag.
By using the host attribute we can set all the required Tailwind classes:
import { Directive } from '@angular/core';

@Directive({
  selector: 'button',
  standalone: true,
  host: {
    'class': `
      px-8
      py-2
      border-2
      rounded-lg
      border-lime-600
      bg-lime-600
      hover:bg-lime-800
      hover:border-lime-800
      transition
      ease-in-out
      font-bold
    `
  }
})
export class ButtonDirective { }
This Directive, thanks to the the selector set to ‘button’, will be applied to all the buttons in the project.
Let’s now add a Button component in the AppComponent template:
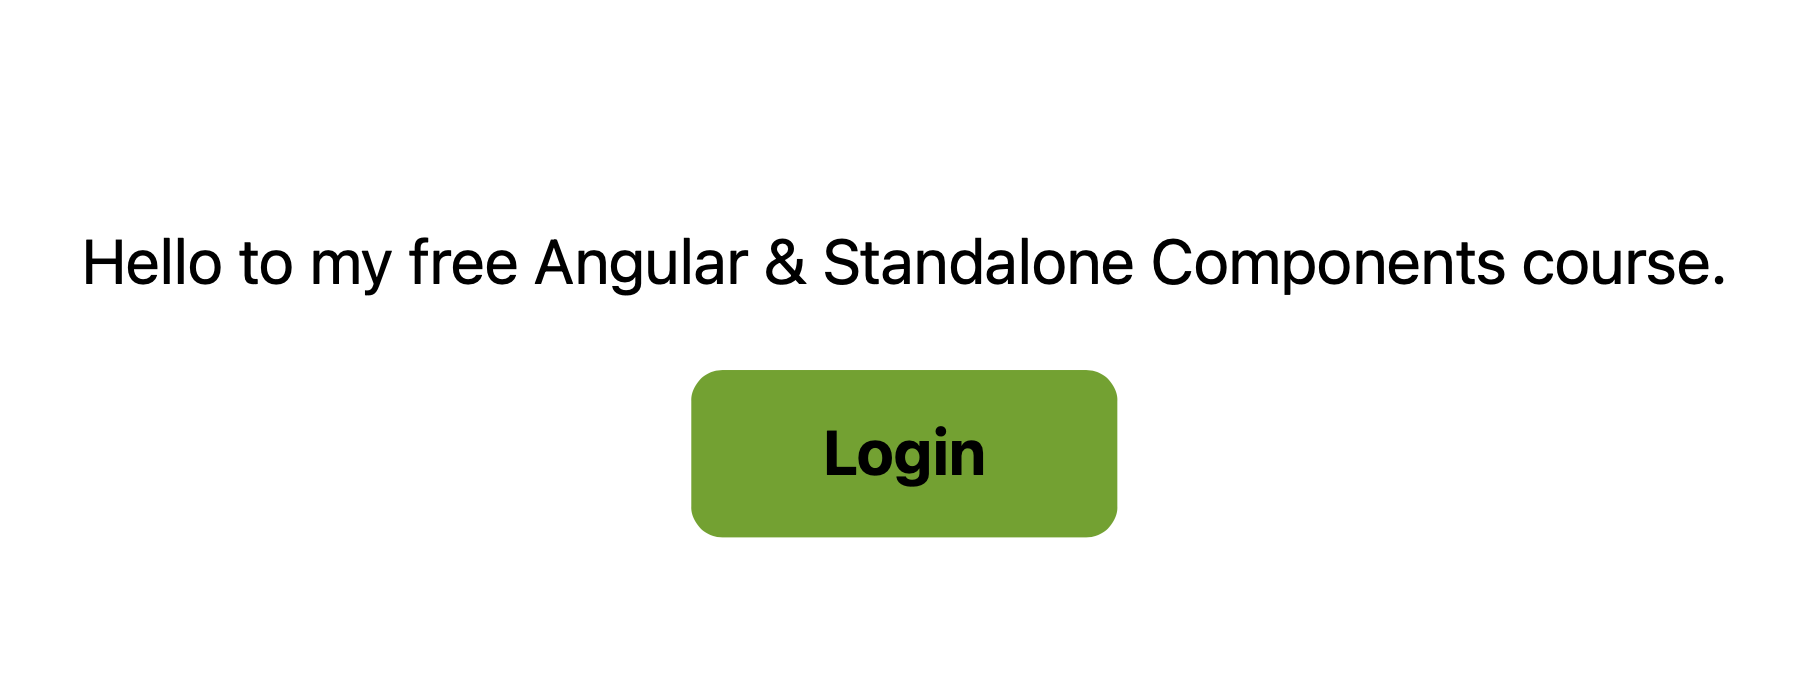
<div class="flex flex-col h-full items-center justify-center">
    <h1>Hello to my free Angular & Standalone Components course.</h1>

    <button class="mt-4">Login</button>

    <router-outlet></router-outlet>
</div>
However, if you try to run the project, you’ll see that the button is not styled at all.
The reason must be searched into the app.module.ts file. Oh wait! We don’t have an app.module.ts file! 🤯
The Standalone way
A component that want to use a standalone component, has to import that component. ✅
Let’s edit the app.component.ts file and import the ButtonDirective:
import { Component } from '@angular/core';
import { CommonModule } from '@angular/common';
import { RouterOutlet } from '@angular/router';
import { ButtonDirective } from './ui/button.directive';

@Component({
  selector: 'fradev-root',
  standalone: true,
  imports: [
    CommonModule,
    RouterOutlet,
    ButtonDirective,
  ],
  templateUrl: './app.component.html',
  styleUrls: ['./app.component.scss']
})
export class AppComponent {
  title = 'train-online';
}
The imports section has three entries so far:
CommonModuleis required to use*ngIf,*ngFor,ngClass,ngSwitch, the async pipe and more.RouterOutletis required to use the<router-outlet>directive.ButtonDirectiveis required to style allbuttonelements.
And now we got it, look at the preview:
The Github Repo
You can find the source code of this step of the course right on GitHub.What’s next
In the next chapter, we’ll see how to add the Router to the App in order to get a real navigation.
Register to the newsletter if you want to know when the new chapter is ready.
 Whatsapp